
This article walks you through preparing your data file, uploading it to the SuntheticsML platform, and avoiding the most common errors first-time users run into.
What You’ll Need- A dataset with at least 5 experiments (rows) — start with what you already have today!
- Your data file saved as .csv or .xlsx
|
⚡ New: Lithium is now the default algorithm (*starting April 2026) Lithium consolidates Campaign Details and the data file upload into a single step, so this guide reflects that streamlined flow. Existing Helium and Hydrogen campaigns are unaffected. |
Step 1 — Prepare Your Data File
Your upload file is the foundation of every prediction SuntheticsML makes and the ML model that is generated.
Structure rules for the Upload File
- Each row = one experiment (one observation, one data point)
- Each column = one variable (input or output)
- First row = column headers — name your variables here
- Inputs = what you control (temperature, equivalents, solvent, catalyst…)
- Outputs = what you measure (yield, selectivity, purity, cost…)
Example dataset
|
Temp_C |
AA_eq |
Solvent |
Yield |
|---|---|---|---|
|
25 |
1.2 |
DMF |
68 |
|
50 |
1.5 |
THF |
82 |
|
75 |
2.0 |
DMF |
91 |
|
60 |
1.8 |
MeCN |
77 |
|
40 |
1.0 |
THF |
54 |
Inputs: Temp_C, AA_eq, Solvent
Output: Yield
Variable naming rules
|
✅ Do’s |
❌ Don’ts |
|---|---|
|
Keep variable names 1–8 characters |
Do not exceed 20 characters (breaks plot readability in finished Sunthetics campaigns) |
|
Start with a letter |
Do not start with 'is' or 'has' |
|
Use unique names |
Do not repeat or duplicate column names |
|
Keep level names ≤ 8 characters |
Do not use long labels like: Tetrahydrofuran_anhydrous |
|
Stick to letters, numbers, underscores |
Do not use °, %, µ, spaces, or emojis in headers |
Step 2 — Run the Pre-Upload Checklist
Skip any of these key data upload requirements and you’ll hit blocking warnings during campaign setup. Your file must adhere to the following:
☐ At least 5 rows of input data (5 experiments minimum)
☐ No duplicate column headers (variable names must be unique)
☐ No empty cells in input columns (every input value must be populated)
☐ Every input and output column has variance — values actually change across rows. A column where every row says “25” will not provide enough useful information for modeling and optimization.
☐ No two columns are perfectly correlated (e.g. Temp_C and Temp_F containing the same information)
☐ Categorical labels are spelled consistently — DMF ≠ dmf ≠ “DMF ” (with a trailing space)
☐ Numerical columns should only contain numbers — no text like N/A, trace, <5 in numeric columns
☐ No formulas left over from Excel — paste as values before saving
☐ Output variables/columns must have continuous numerical values
|
💡 Not sure if your data is clean enough? Upload it anyway. SuntheticsML will surface Data Quality Warnings automatically, and you can fix issues before launching. The Sunthetics team can also help — email support@sunthetics.io. |
📁 Download the Sample Campaign Data XLSX File here
The header row should contain JUST the variable names. Please note the sample file shows inputs and outputs for easier recognition, but you do not need to list which columns are inputs versus outputs in your own data file.
-
I.e., the colored text in the variable names would be deleted before uploading the file to Sunthetics.
The subsequent rows should contain the data points for each experiment.
Step 3 — Upload to SuntheticsML
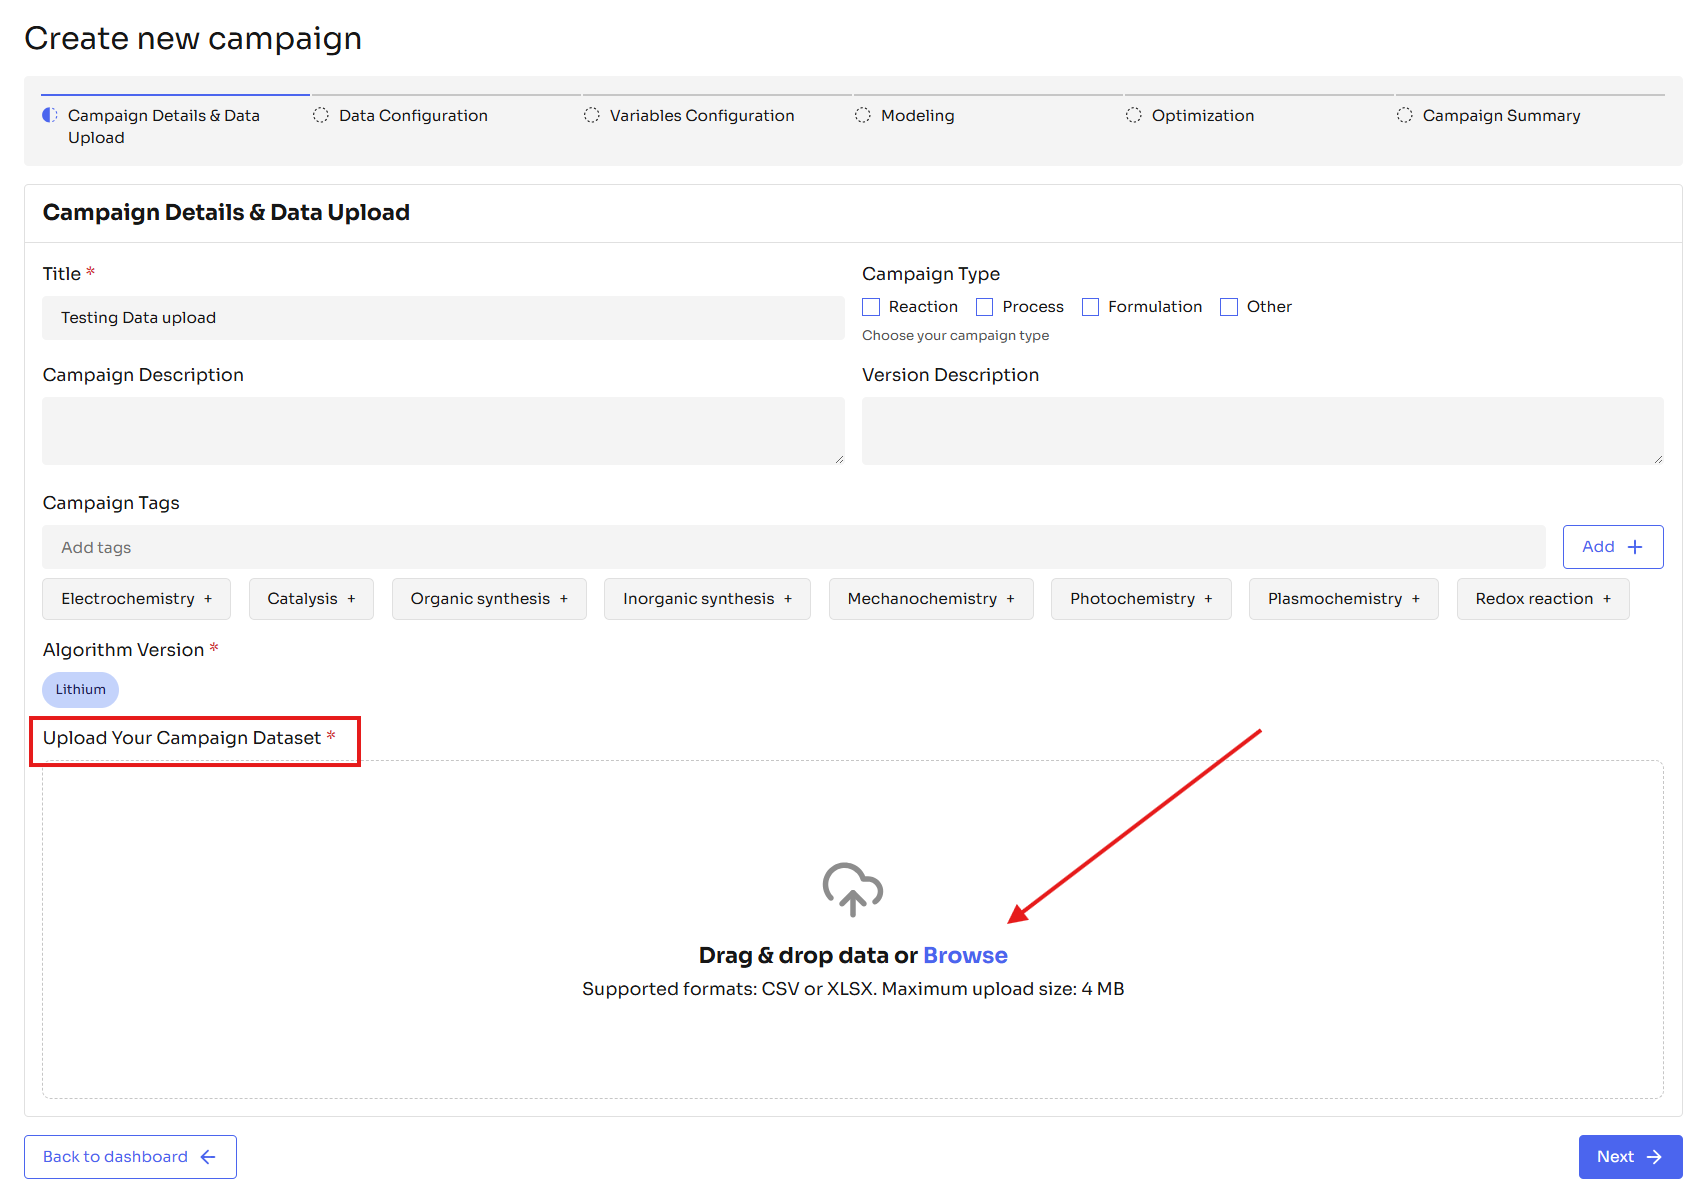
- From the Dashboard, click Create a Campaign in the top left.
- In the first step (for the Lithium ML algorithm campaigns), fill in the following fields:
- Campaign Title — be specific. Helps distinguish campaigns for yourself and your team/colleagues in the future.
- Description (optional) — what you’re optimizing and why throughout the campaign.
- Campaign Type — Reaction, Process, Formulation, or Other
- Tags (optional) — pick from frequently used tags, or type your own to create a custom tag and press Enter
- Click Upload data and select your .csv or .xlsx file from your computer. You can also drag and drop a file into the window directly for easier use.
- Click Next to move into the Data Configuration step.
|
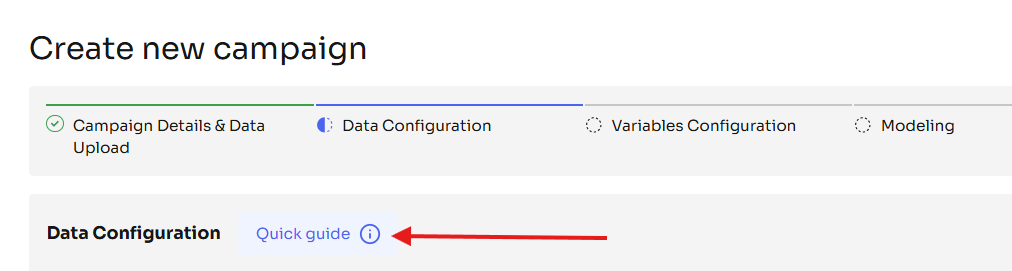
🚀 Tip The new Quick Guide info modal built into Lithium walks you through best practices at each step. Use it the first few times — it’s faster than jumping back to docs.
|
Step 4 — Confirm What the Platform Sees
Once the file is uploaded, SuntheticsML displays your dataset in a table and asks you to:
- Tag each column as an Input or Output (default is Input — flip the toggle to the right (green) for outputs).
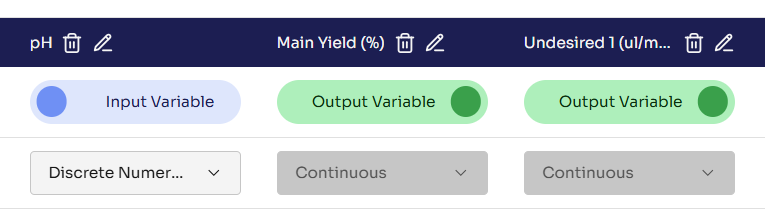
- Pick a variable type for each input:
|
Type |
Use it for |
|---|---|
|
Continuous |
Any numeric value in a range (mass, temperature, concentration) |
|
Discrete Numerical |
Numbers limited to specific discrete values (e.g., pH = 6, 7, 8) |
|
Categorical |
Non-numeric attributes, allowed for alphanumeric characters (e.., names of solvents, bases, catalyst types) |
|
Time |
Measurements taken at intervals over time |
|
Chemical |
Molecules defined by SMILES strings - valid SMILES are required in these columns |
Common Issues & Fast Fixes
|
Issue |
Fix |
|---|---|
|
⚠️ “Column has no variance” warning |
All values in that column are identical — drop the column, or vary the experiments |
|
⚠️ “Potential variable correlation” warning |
Two inputs move together. Usually safe to keep one and drop the other — but check with your team first |
|
❌ Upload fails on .xlsx |
Re-save as .CSV. Eliminates hidden formula and format issues |
|
❌ Special characters break headers |
Stick to letters, numbers, underscores. No °, %, µ, spaces, or emojis |
|
❌ Numeric column rejected |
Replace text values like N/A or trace with actual numbers |
|
❌ File too large or has many sheets |
Keep one sheet. Rows = experiments. Columns = variables. Remove other file content and ensure upload size is within the maximum allowable limit (maximum of 4 MB). |
What Happens Next
After your upload, you’ll move through the rest of the Lithium campaign setup:
- Variables Configuration — set min/max ranges for inputs and outputs and update variable levels
- Modeling — pick Automatic (recommended) or Manual model selection for each output variable
- Optimization — define goals (Maximize, Minimize Track) for each output, input constraints, and your overall campaign optimization goal
- Summary — review configuration, set number of suggested + exploratory experiments, and launch
Need Help?
- 📧 Technical support: support@sunthetics.io
- 📚 More guides: browse the full Knowledge Base